
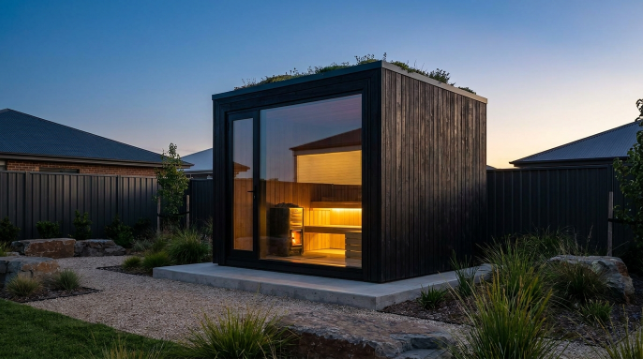
A cube sauna needs a low intake vent near the heater and a higher exhaust vent on an opposite or adjacent wall to keep air moving, feed the heater, and clear moisture between sessions, and getting this right costs very little compared with the rest of the build. A basic vent kit runs a modest amount as a one-time material cost, while an optional powered exhaust fan for faster drying is the bigger line item, mainly because of the labor if it needs its own wiring. Skipping proper ventilation does not save real money and it does cost you in stuffy sessions and mildew over time.
The Vent Kit Itself: What It Actually Costs
A basic passive vent kit, an intake grille near the heater and an exhaust vent on the opposite wall, is one of the cheapest components in a cube sauna build. Most manufacturers include this as a standard part of the cabin rather than an add-on, so for a factory-built unit there is often nothing extra to budget here beyond what is already in the base price. For a DIY build or a retrofit on an older cabin missing proper vents, the hardware itself, grilles, trim, and a damper if you want adjustable airflow, is a modest expense, closer to a small hardware-store purchase than anything that meaningfully moves the total project cost. The real spend, if there is one, shows up in labor if someone other than the owner is cutting and framing the vent openings into an existing wall.
Intake Placement: Why It Sits Low, Near the Heater
Cold, denser air naturally sits low in a room, and placing the intake vent low on the wall near the heater lets that air pass close to the heat source before it rises and circulates through the cabin. This placement is close to universal across electric sauna heater installations because it works with the physics rather than against it, feeding the heater fresh air right where it needs it and helping stones and elements perform consistently. There is no meaningful cost difference between placing an intake correctly versus incorrectly; it is purely a design and installation decision, which is exactly why it is worth confirming on any prebuilt cabin before assuming the factory got it right, and why a DIY builder should not treat vent placement as a minor detail to sort out later.
Exhaust Placement: Getting the Stale, Moist Air Out
The exhaust vent sits higher on an opposite or adjacent wall, positioned to pull warm, moist air across the room and out rather than letting it pool near the ceiling indefinitely. Correct exhaust placement is what keeps a session from feeling thick or stagnant twenty minutes in, and it is also what allows the cabin to dry out reasonably fast once a session ends, which matters directly for mildew prevention. Like the intake side, getting this right adds essentially nothing to material cost since it is the same style of vent and grille used on the intake side; the cost, if it exists at all, is a few extra minutes of installation planning.
When a Powered Fan Is Worth the Extra Cost
A passive vent setup is sufficient for most households, but owners in humid climates, or anyone using the cabin daily, sometimes add a small exterior-mounted extraction fan to speed up drying between sessions and cut down on the musty smell that builds in a sauna that never fully dries out. This is the one ventilation upgrade with a real cost attached: the fan unit itself is a moderate purchase, and if it needs its own electrical run rather than tapping an existing circuit, a licensed electrician’s time becomes the bigger part of the total bill. Anyone budgeting for a cube sauna who already knows they will want faster drying, because of climate, frequency of use, or simply wanting to keep the interior wood looking newer longer, should price this in at the same time as the heater’s electrical circuit rather than as an afterthought project a year later.
What It Costs to Get Ventilation Wrong
Skipping or undersizing vents does not show up as a line item, but it shows up in other ways that end up costing more over time. Poor airflow makes for a stuffier, more uneven session, since heat and humidity have nowhere to go and no fresh air is reaching the heater properly. Moisture that lingers between sessions is the single biggest contributor to mildew and eventual wood staining inside a cabin, and dealing with that after the fact, deep cleaning, refinishing, or in bad cases replacing affected boards, costs far more than the vent kit would have. Buyers evaluating a specific model’s ventilation design before purchase can review the listing at https://sweatdecks.com alongside other retailers to compare how vent placement and sizing are described for a four-person cabin.
What the Broader Research Says About Air Quality and Sauna Sessions
There is less published research specifically on sauna ventilation engineering than on the health effects of sauna bathing itself, but the general literature on heat exposure is relevant background. A 2018 review in Mayo Clinic Proceedings summarizing cardiovascular associations with sauna use, and a systematic review in Evidence-Based Complementary and Alternative Medicine covering regular dry sauna bathing, both describe sessions conducted in properly functioning saunas as the baseline condition, underscoring that consistent, well-ventilated heat is the pattern actually studied. A separate paper in The American Journal of Medicine on the benefits and risks of sauna bathing likewise assumes a properly functioning cabin as the starting point. None of this is a citation for any specific vent design, but it is a reminder that the research behind sauna’s reputation describes sessions in cabins that work as intended, not ones fighting bad airflow.
Frequently Asked Questions
Why does a cube sauna need vents if it already has a door? A door does not move air while closed. Intake and exhaust vents create a slow, continuous exchange that feeds oxygen to the heater, carries out excess moisture, and keeps air from stagnating during a session.
Where should the intake vent sit relative to the heater? Typically low on the wall near the heater, so incoming air passes close to the heat source before circulating. This is standard placement across most electric sauna heater installations.
Does adding a second vent or a fan cost much to install? A basic passive vent kit is inexpensive. An exterior-mounted extraction fan for faster drying adds a bigger cost, generally requiring an electrician if it needs its own wiring run.
What happens if a cube sauna’s vents are blocked or too small? Poor airflow leads to stuffy, uneven heat, moisture that lingers and encourages mildew, and in some cases a heater that struggles to reach or hold temperature efficiently.
References
- Cardiovascular and Other Health Benefits of Sauna Bathing: A Review of the Evidence, Mayo Clinic Proceedings, 2018
- Clinical Effects of Regular Dry Sauna Bathing: A Systematic Review, Evidence-Based Complementary and Alternative Medicine, 2018
- Benefits and risks of sauna bathing, The American Journal of Medicine, 2001
By Sasha Ferro